


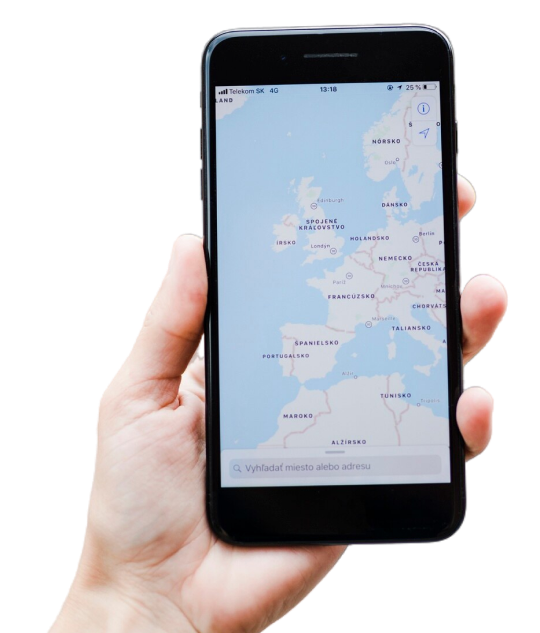
How to Install an eSIM on iPhone or Android: Step-by-Step Guide for Travellers (2026)
You've picked your destination, chosen your plan, and received your eSIM QR code by email. Now what?
Installing an eSIM takes less than five minutes on most phones — but only if you know the right settings to change. Get one setting wrong (like forgetting to switch your mobile data source) and you'll land at your destination wondering why you're not connected.
This guide walks through the complete installation process for both iPhone and Android, covers every "why isn't it working?" scenario, and answers the questions most travellers have before their first eSIM.
Before You Start: Check Your Phone Is eSIM Compatible
Not every phone supports eSIM. Here's a quick compatibility reference:
iPhone
- iPhone XS, XS Max, XR and newer — all eSIM compatible
- iPhone 15 and newer (sold in Australia) — eSIM only, no physical SIM tray
- iPhone SE (2nd generation, 2020) and newer — eSIM compatible
Samsung Galaxy
- Galaxy S20 series and newer — eSIM compatible
- Galaxy Z Fold and Z Flip series (all generations) — eSIM compatible
- Galaxy Note 20 and newer — eSIM compatible
Google Pixel
- Pixel 3 and newer — eSIM compatible
Other Android
- Most flagship Android phones released after 2020 support eSIM
- Budget and mid-range Android phones vary — check your phone's Settings → About Phone → SIM Status, or search "[your phone model] eSIM compatible"
One important check: Some phones sold through certain carriers are "SIM-locked" and may not accept third-party eSIMs. Phones purchased outright from a manufacturer or from a retailer (not on a plan) are almost always unlocked. If your phone is carrier-locked, contact your provider to request an unlock before your trip.
Not sure if your phone is compatible? Contact us before you buy and we'll confirm for you.
What You'll Need Before You Install
- Your eSIM QR code (sent by email after purchase — have it open on another device, or printed)
- A Wi-Fi connection (required for the download step)
- Your phone is charged to at least 30%
- 1 minutes
Important: You do not need to be at your destination to install the eSIM. In fact, we recommend installing it at home so you're connected the moment you land. The eSIM will simply sit dormant until you arrive in the destination country.
How to Install an eSIM on iPhone
Step 1: Open Settings and Add a New Plan
- Go to Settings → Mobile Service (or Cellular on older iOS versions)
- Tap Add eSIM (or "Add Mobile Plan" on older iOS)
- Select Use QR Code
- Scan the QR code from your eSIM4u confirmation email using your camera
Can't scan the QR code? If you're using the same device that received the email, you can't scan your own screen. Instead:
- Forward the email to another device and scan from there, or
- Tap Enter Details Manually and type in the activation code printed below the QR code in your email
Step 2: Name Your eSIM
When prompted to label the new plan, give it a name you'll recognise — "Travel", "Bali", "Japan", or whatever your destination is. This makes it easy to identify in Settings later.
Step 3: Set Your Default Lines Correctly
This is the most important step and where most people go wrong.
When asked how you want to use each SIM, set it up as follows:
| Setting | Choose |
|---|---|
| Default Line (calls) | Primary (your Australian SIM) |
| iMessage & FaceTime | Primary (your Australian SIM) |
| Mobile Data | Your travel eSIM (e.g., "Bali") |
This setup means your calls and messages still come through on your Australian number, but all data (maps, internet, apps) runs through your travel eSIM. You will not be charged Australian roaming rates for data.
Step 4: Turn On Data Roaming for Your Travel eSIM
- Go to Settings → Mobile Service
- Tap your travel eSIM (e.g., "Bali")
- Make sure Data Roaming is switched ON
Then tap your Primary (Australian) SIM and make sure Data Roaming is switched OFF — this prevents any accidental data charges on your home plan.
Step 5: You're Done — Test It
When you arrive at your destination, your phone will automatically connect to a local carrier. You should see 5G or 4G LTE in your signal bar within a few minutes.
If you don't connect immediately: toggle Airplane Mode on, wait 30 seconds, then toggle it off again. This forces your phone to search for a local network. Connection can sometimes take up to 15 minutes in areas with multiple competing carriers.
How to Install an eSIM on Android
Android installation varies slightly by manufacturer, but the core process is the same across Samsung, Google Pixel, and most other Android devices.
Step 1: Open Settings and Add a New eSIM
Samsung: Settings → Connections → SIM Manager → Add eSIM
Google Pixel: Settings → Network & Internet → SIMs → Add eSIM
Other Android: Settings → Mobile Network → Add eSIM (or "Manage SIMs" → Add)
Tap Scan QR Code and scan the code from your eSIM4u confirmation email.
Can't scan the QR code on the same device? Tap Enter Activation Code Manually and type in the code from your email.
Step 2: Activate the eSIM
Once scanned, your phone will download and activate the eSIM profile. You'll see it appear in your SIM list, usually labelled "Carrier" by default. You can rename it to something recognisable if your phone allows it.
Toggle the Data Roaming switch to ON for the eSIM plan.
Step 3: Set Your eSIM as the Mobile Data Source
Go to Settings → Connections → SIM Manager → Mobile Data (Samsung) or Settings → Network & Internet → SIMs → Preferred SIM for data (Pixel) and select your travel eSIM.
Make sure mobile data on your primary (Australian) SIM is set to Off or that roaming is disabled, to avoid unexpected charges from your home carrier.
Step 4: Check or Set the APN (Android Only)
Most eSIM4u plans automatically configure your APN (Access Point Name) settings the moment you activate. You don't need to do anything.
If you're having trouble connecting after arriving at your destination, you may need to set the APN manually:
- Go to Settings → Connections → Mobile Networks → Access Point Names (Samsung) or Settings → Network & Internet → SIMs → [your eSIM] → Access Point Names (Pixel)
- Tap the + or Add button
- In the Name field, type any label (e.g., "Travel")
- In the APN field, enter the APN value shown on your eSIM plan page or your confirmation email, which contains your QR code and a link to check your remaining data and APN settings — simply click the link.
- Leave all other fields as they are
- Save and select the new APN
- Restart your phone
Step 5: Test Your Connection
Your phone should connect to a local carrier automatically when you arrive. Check for 5G or 4G LTE in your signal bar. If nothing appears after a few minutes, toggle Airplane Mode on and off to prompt a network search.
Installing Before You Travel vs. At the Destination
You can install your eSIM at any time after purchase — including weeks before your trip. The eSIM will simply sit inactive on your phone until it detects a network in the destination country.
Advantages of installing at home:
- You're connected the moment you step off the plane — no fumbling in arrivals
- You can troubleshoot any issues while you still have access to home Wi-Fi and time
- Your phone will auto-connect at the destination without any action needed
One thing to note: Some eSIM plans start their validity period from the moment of first use (first network connection), while others start from the date of purchase. eSIM4u plans activate on first use, so installing early does not waste any of your plan.
Troubleshooting: Why Is My eSIM Not Working?
My phone isn't connecting to a network after landing
Toggle Airplane Mode on, wait 30 seconds, toggle off. If still not connecting after 10–15 minutes, go to Settings → Mobile Service (iPhone) or Mobile Networks (Android) → Network Selection → change from Automatic to Manual, then select a local carrier from the list. Switch back to Automatic after connecting.
I'm connected but have no internet
On Android, this is usually an APN issue. Follow the APN setup steps above, using the APN value from your confirmation email.
On iPhone, go to Settings → Mobile Service → your travel eSIM and confirm Data Roaming is switched ON.
I accidentally used my Australian SIM's roaming data
Check that your Australian SIM has Data Roaming switched OFF (iPhone: Settings → Mobile Service → Primary SIM → Data Roaming off). If you've already incurred charges, contact your Australian carrier — many will waive first-time roaming incidents.
The QR code won't scan
Make sure the QR code is displayed at full brightness on a clear screen. If using the same phone that received the email, forward the email to another device. Alternatively, use the manual activation code printed below the QR code in your email.
My phone says "SIM not supported" or "carrier locked"
Your phone may be locked to a specific carrier. Contact your Australian carrier (Telstra, Optus, Vodafone, etc.) and request an unlock — it's free in Australia and usually completed within 24 hours. Once unlocked, re-attempt the eSIM installation.
I've used all my data and need more
Check your remaining data in Settings → Mobile Service → your eSIM. If you've run out, visit esim4u.com.au to purchase a new plan for your destination and install it the same way.
Frequently Asked Questions
Will my eSIM work straight away when I land? In almost all cases, yes. Your phone will auto-connect to a local carrier within a few minutes of landing. The Airplane Mode toggle trick resolves most delayed connections.
Can I keep my Australian number active while using the travel eSIM? Yes — this is one of the main advantages of eSIM over a physical travel SIM. Your Australian number stays active on your primary SIM. Calls and texts to your Australian number still come through; you just use the travel eSIM for mobile data.
How do I know how much data I have left? Your confirmation email contains your QR code and a link to check your remaining data and APN settings — simply click the link to get started.
Can I use my eSIM on multiple trips? Each eSIM plan is for a specific trip and will expire based on the plan's validity period. Once expired, you'll need to purchase a new plan. However, some plan types allow top-ups — check your specific plan details.
What happens when my data runs out? Your data connection stops. You won't be charged extra — eSIM4u plans are prepaid, so there's no bill shock. Simply purchase a new plan if you need more data.
Is my eSIM4u plan covered by a money-back guarantee? Yes. If you cancel your trip or experience technical issues we can't resolve, we'll refund you in full. See our Money Back Guarantee for full details.
Ready to Get Connected?
Browse travel eSIM plans by destination:
- Japan eSIM
- Bali & South East Asia eSIM
- Europe & UK eSIM
- USA eSIM
- China, Hong Kong & Macau eSIM
- New Zealand eSIM
- Browse all destinations
Once you've purchased, your QR code will arrive by email within minutes. Installation instructions are also available on our dedicated setup pages: iOS installation guide | Android installation guide.
Also useful: eSIM vs Physical SIM — Which Is Better for International Travel? | How to Make Your Travel Data Plan Last: 20 Practical Tips | Best eSIM for International Travel: The Complete Australian Guide
Related Blogs
Explore the World Without Roaming Worries

100% Money Back Guarantee
If you cancel your trip or experience tech issues that we can’t fix; we’ll refund you 100%.