


Buy an eSIM before your international trip in 2026
Buying an eSIM before your international trip is the single most effective way to guarantee mobile connectivity the moment your plane lands. Rather than scrambling for a local SIM card at the airport or paying steep roaming fees, you can purchase a prepaid travel eSIM online, install it at home, and connect automatically when you arrive. Apple, T-Mobile, and travel planning platform Wego all recommend pre-purchasing as the smarter approach. This guide covers everything you need to know: why to buy early, what to check first, how to install correctly, and how to avoid the mistakes that catch most travellers off guard.
Why you should buy an eSIM before your international trip
Buying a travel eSIM before you leave gives you control over cost, coverage, and timing. Airport SIM kiosks charge a premium, often two to three times the price of an equivalent plan purchased online. Providers like Airalo and Esim4u offer prepaid plans across dozens of countries at transparent, fixed rates. You browse, compare, and pay from your couch before you even pack your bag.
The cost savings are only part of the story. Roaming charges from Australian carriers can reach $10 to $15 per day for basic international data passes. A prepaid eSIM plan for the same destination often costs less for the entire trip. That difference adds up fast on a two-week holiday.
Pre-purchasing also removes the stress of arriving somewhere unfamiliar without connectivity. You need maps, translation apps, and ride-share services the moment you clear customs. Not three hours later, after you’ve found a working kiosk and waited in a queue.
Here is why buying early makes practical sense:
- Coverage confirmation. You can verify the plan covers every country on your itinerary before you commit.
- Better plan selection. Online providers offer more plan types, including data-only, data plus calls, and multi-country options.
- Troubleshooting time. If installation fails, you have days to fix it rather than minutes at the airport.
- No identity verification delays. Some countries require passport ID for local eSIM purchases. Buying a roaming-based international eSIM online skips that requirement entirely.
Pro Tip: Choose a plan where validity starts on your first connection to a foreign network, not when you install the profile. This protects every day of your paid plan from being wasted during pre-travel setup.
What you need to check before buying an eSIM for travel
Before you purchase any international travel eSIM, three checks will save you from a frustrating experience abroad.
Device compatibility
Your phone must support eSIM technology. Most flagship smartphones released after 2018 do, including the iPhone XS and later, Samsung Galaxy S20 and later, and Google Pixel 3 and later. Verify your device against your provider’s compatibility list before purchasing, because international model variants sometimes lack certain band support.
Unlock status
This is the check most travellers skip. An unlocked phone is required to install a second local eSIM. If your device is locked to your home carrier, you cannot add a separate travel eSIM. You would need to use your carrier’s international roaming pass instead. Contact your carrier to confirm unlock status at least a week before departure.
Your existing plan’s roaming inclusions
Many home carrier plans already include international roaming for certain countries. If your current Telstra, Optus, or Vodafone plan covers your destination with a reasonable data allowance, buying a separate eSIM may not be necessary for short trips. Check your plan details first to avoid paying twice.
| Check | What to do | Why it matters |
|---|---|---|
| Device eSIM support | Check Apple or Android compatibility lists | Prevents failed installation |
| Phone unlock status | Contact your home carrier | Required to use a second eSIM |
| Existing roaming inclusions | Review your current plan details | Avoids unnecessary purchase |
| Destination coverage | Confirm plan covers all countries visited | Prevents dead zones mid-trip |
Pro Tip: If you bought your phone outright or have been with your carrier for more than 12 months, it is likely already unlocked. A quick call to confirm takes two minutes and prevents a major headache.
How to buy and install your travel eSIM before you leave
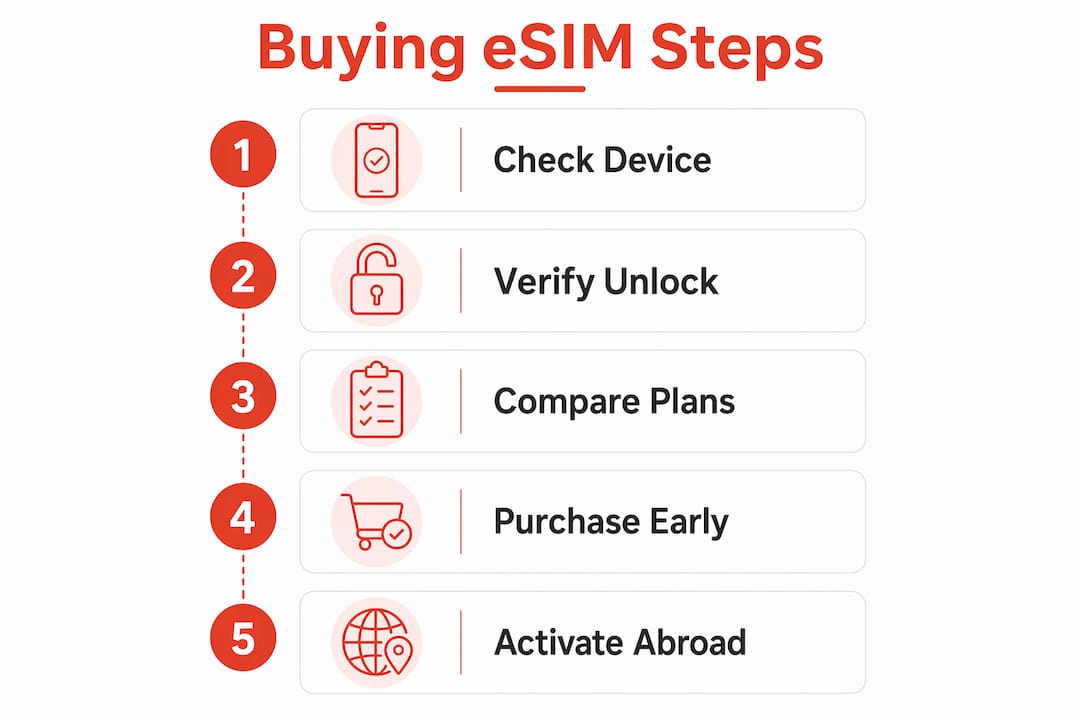
The process is straightforward when you follow the right order. Here is a step-by-step breakdown.
-
Choose your provider and plan. Decide between a local carrier eSIM for a single country or a worldwide plan. Worldwide eSIM plans can cover 190+ countries and are available through provider apps on the iPhone App Store or directly on provider websites. For multi-country trips, a global plan from Esim4u removes the need to juggle multiple profiles.
-
Purchase online. Complete your purchase on the provider’s website or app. You will receive a QR code by email or within the app. Keep this accessible on a second device or print it, because you cannot scan a QR code with the same phone you are installing it on.
-
Install the eSIM profile. On iPhone, go to Settings > Mobile Data > Add eSIM, then scan the QR code. On Android, the path varies by manufacturer but is typically Settings > Connections > SIM Manager > Add eSIM. The eSIM install process involves a secure download from a subscription manager server (called an SM-DP+ server) that stores your profile until activation. This happens automatically in the background.
-
Label your eSIM clearly. Name it “Travel” or by destination so you can switch between your home SIM and travel eSIM without confusion.
-
Do not activate yet if your plan charges from installation. Select plans where validity starts on first foreign network connection, not at profile download. If your plan starts counting from installation, wait until you land to activate.
-
Test the installation before you leave. Confirm the eSIM profile appears in your settings and is listed as installed. You do not need to activate it. You just need to know it is there and ready.
Here is a quick comparison of plan types to help you choose:
| Plan type | Best for | Limitation |
|---|---|---|
| Single-country eSIM | One destination, longer stay | No coverage if you cross borders |
| Regional eSIM | Multi-country trips in one region | May not cover all countries in region |
| Global eSIM | Frequent travellers, complex itineraries | Slightly higher cost per GB |
Most travellers should buy their eSIM 3 to 7 days before departure to allow time for troubleshooting. Buying the day before leaves no room to fix problems.
Common mistakes when buying and activating eSIMs for travel
Even experienced travellers make these errors. Knowing them in advance means you will not.
- Activating too early. If your plan’s validity clock starts at installation rather than on first foreign connection, every day you spend at home eats into your paid plan. Always read the activation trigger terms before installing.
- Not checking unlock status. Discovering your phone is locked after you have already purchased an eSIM plan is a costly mistake. Verify unlock status before you spend a cent.
- Choosing a plan without full destination coverage. A plan that covers mainland Europe may not cover Turkey, Morocco, or the UK. Check the coverage list for every country on your itinerary, not just the first stop.
- Confusing local eSIMs with roaming eSIMs. Local eSIMs purchased at carrier stores in some countries require passport identification. International roaming eSIMs bought online typically do not. If you want to skip the ID process, buy online before you travel.
- Ignoring data validity vs plan validity. Some plans expire after 30 days regardless of how much data you have used. Others expire when data runs out. Know which type you are buying.
If your eSIM fails to activate on arrival, contact your provider’s support team immediately. Most reputable providers offer live chat or email support around the clock. Keep your order confirmation and QR code accessible so support staff can troubleshoot quickly.
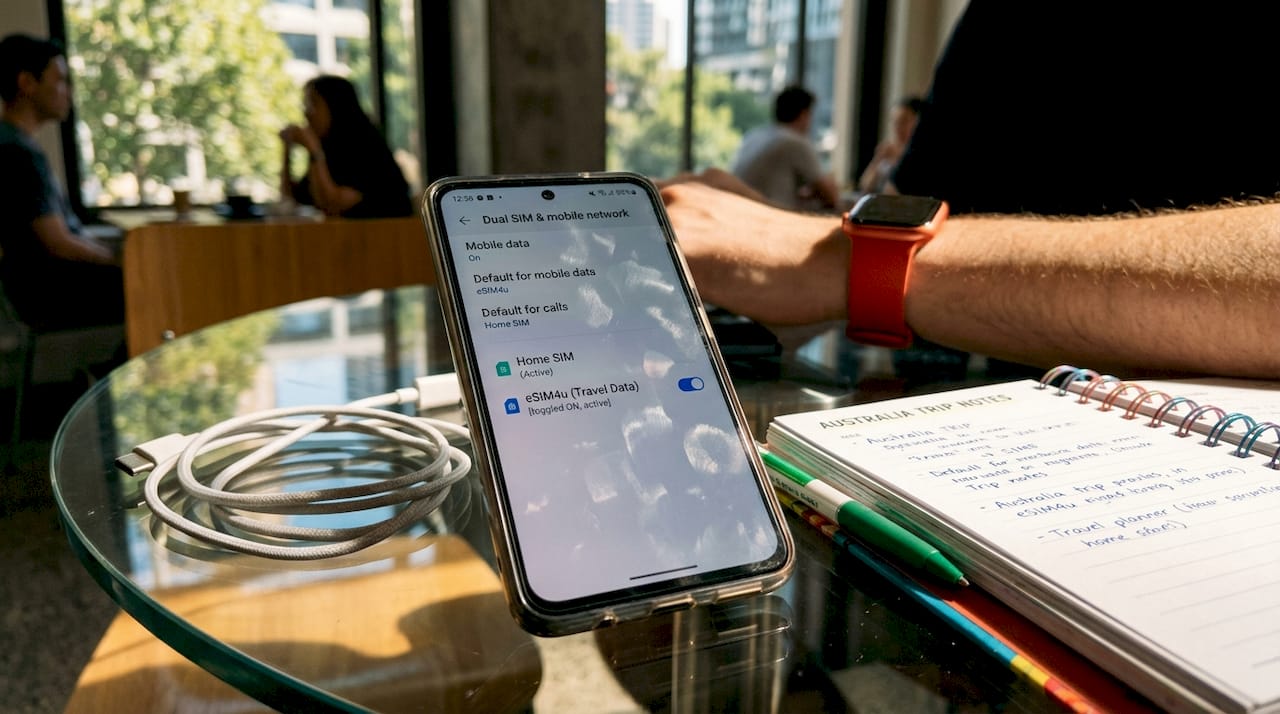
How to manage your eSIM alongside your home SIM while travelling
Modern smartphones with dual SIM support let you run your home SIM and travel eSIM at the same time. This is one of the most underused features for international travellers.
Dual SIM phones manage home and travel eSIMs simultaneously, so your Australian number stays active for calls and SMS while all data routes through your cheaper travel eSIM. Friends and family can still reach you on your regular number without you paying data roaming rates.
The key settings to adjust before you fly:
- Set your travel eSIM as the default data line.
- Keep your home SIM active for calls and SMS only.
- Turn off data roaming on your home SIM to prevent accidental charges.
- Enable Wi-Fi calling on your home number if your carrier supports it, as this lets you make and receive calls over Wi-Fi at no extra cost.
Managing multiple eSIM profiles is simple on both iPhone and Android. You can store several profiles on your device and switch between them without removing any physical SIM. This is particularly useful for frequent travellers who visit the same regions regularly and want to reuse a plan.
Key takeaways
Buying an eSIM before your international trip, with the right plan and correct activation timing, delivers affordable connectivity from the moment you land.
| Point | Details |
|---|---|
| Buy 3 to 7 days early | Gives you time to troubleshoot installation before departure. |
| Check unlock status first | A locked phone cannot install a second eSIM for travel. |
| Choose activation-on-arrival plans | Validity that starts on foreign network connection protects every paid day. |
| Verify full destination coverage | Confirm every country on your itinerary is covered, not just the first. |
| Use dual SIM for home and travel | Keep your Australian number active while routing data through the travel eSIM. |
Get connected before you leave with Esim4u
Esim4u makes it straightforward to buy an international eSIM online before your trip, with prepaid plans covering Asia, Europe, the USA, China, and 120+ countries worldwide. Every plan comes with clear coverage details, transparent pricing, and no hidden fees. If you are travelling on an iPhone, the dedicated iPhone eSIM setup guide walks you through installation step by step. Android guides are available too. Browse plans, confirm your destination is covered, and have your eSIM installed and ready before you reach the airport. Hassle-free travel connectivity starts well before you board.
FAQ
Do I need to buy an eSIM before I travel internationally?
You do not have to, but buying before you travel is strongly recommended. Purchasing in advance gives you time to install, test, and troubleshoot your eSIM before departure, and avoids airport kiosk queues and premium pricing.
When should I activate my travel eSIM?
Activate your eSIM when you land and connect to a foreign network, not at home. Plans that start validity on first foreign connection protect your paid days from being wasted during pre-travel setup.
Does my phone need to be unlocked to use a travel eSIM?
Yes. An unlocked device is required to install a second eSIM from a travel provider. Contact your home carrier to confirm your phone’s unlock status before purchasing any travel eSIM plan.
Can I keep my Australian number active while using a travel eSIM?
Yes. Dual SIM smartphones let you run your home SIM and travel eSIM at the same time. Set the travel eSIM as your default data line and keep your home SIM active for calls and SMS only.
How do I know which eSIM plan covers my destination?
Check the coverage list on your provider’s website before purchasing. For multi-country trips, look at types of travel eSIM plans to find regional or global options that cover every country on your itinerary.
Related Blogs
Explore the World Without Roaming Worries


100% Money Back Guarantee
If you cancel your trip or experience tech issues that we can’t fix; we’ll refund you 100%.