


How eSIM works on iPhone: 2026 guide
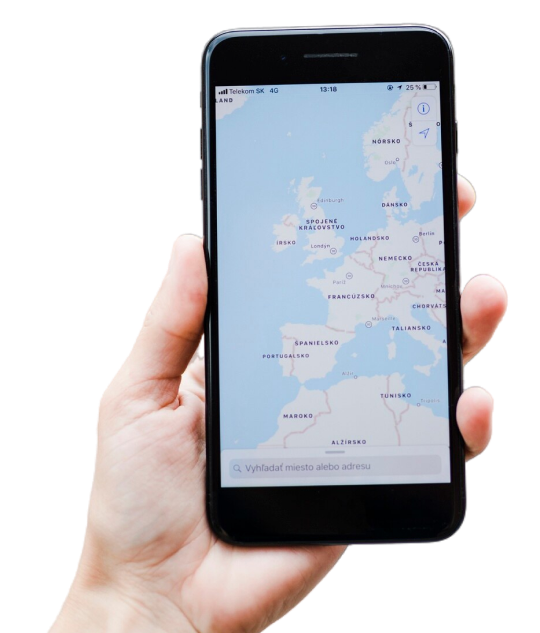
An eSIM on iPhone is a digital SIM card built directly into the device, replacing the need for a physical SIM card and letting you activate and manage cellular plans entirely through software. Apple confirms that eSIM removes physical SIMs, letting you store and manage up to eight or more eSIM profiles on a single iPhone. That flexibility is a genuine shift in how Australians stay connected, especially when travelling abroad. Whether you are switching carriers, adding a travel plan, or moving from Android, understanding how eSIM works on iPhone puts you in control of your connectivity from day one.
How does eSIM work on iPhone?
eSIM stands for embedded SIM. Unlike a traditional SIM card you slot into a tray, an eSIM is a small chip soldered inside your iPhone at the factory. You activate it by downloading a carrier plan digitally, with no card to insert or lose.
Apple supports eSIM on iPhone XS and later models. The iPhone 14 series sold in the United States is eSIM only, with no physical SIM tray at all. That tells you where the industry is heading.

When you add a plan, your iPhone connects to your carrier’s servers and downloads a digital profile. That profile stores your phone number, carrier settings, and account details. You can switch between profiles in Settings without touching any hardware. The process takes seconds.
The practical result is that you can hold a local Australian number and a travel number on the same iPhone at the same time. You choose which line handles calls, SMS, and data. No second phone. No swapping cards at the airport.
How to set up and activate an eSIM on iPhone
eSIM setup on iPhone is straightforward once you know which method your carrier supports. Apple documents five distinct activation methods for iPhone eSIM activation.
The five activation methods are:
- eSIM Carrier Activation. Your carrier pushes the plan directly to your iPhone during setup. This happens automatically when you buy a new iPhone from a carrier store or online.
- QR Code. Your carrier provides a QR code, either printed or in an email. Go to Settings > Cellular > Add eSIM > Use QR Code, then scan it.
- Carrier App. Download your carrier’s app, sign in, and follow the in-app prompts to assign an eSIM to your device.
- Manual Entry. Your carrier gives you an activation code. Enter it manually in Settings > Cellular > Add eSIM > Enter Details Manually.
- Transfer from Another Device. iOS 26 supports eSIM Quick Transfer, letting you move a plan from a previous iPhone without contacting your carrier.
Before you start, confirm three things: your iPhone model supports eSIM, your carrier offers eSIM plans, and your device is unlocked. Most activation methods require a Wi-Fi connection, though some eSIM-only iPhones can activate over cellular in select regions.
Pro Tip: Check your iPhone’s unlock status before purchasing any eSIM plan. A locked iPhone will only accept eSIM profiles from its locked carrier, which blocks you from adding a travel or local plan abroad.

eSIM vs physical SIM card on iPhone: what is the difference?
The core difference between eSIM and a physical SIM is where your plan lives. A physical SIM is a removable card. An eSIM is a profile stored in your iPhone’s built-in chip. Both connect you to a carrier network, but the experience of managing them is completely different.
eSIM cannot be physically removed if your iPhone is lost or stolen. That is a meaningful security advantage. A thief who steals your phone cannot pull the SIM to avoid tracking or to use your number on another device.
| Feature | eSIM | Physical SIM |
|---|---|---|
| Installation | Digital, no hardware needed | Physical card insertion required |
| Number of profiles | Up to 8+ stored simultaneously | One card per tray slot |
| Security | Cannot be removed if phone is stolen | Can be removed and used elsewhere |
| Travel use | Add local plan instantly, no card needed | Requires purchasing and inserting a local SIM |
| Carrier switching | Done in Settings within seconds | Requires new physical card from carrier |
| Risk of loss or damage | None | Card can be lost, damaged, or bent |
Key eSIM benefits for iPhone users include:
- No more hunting for a SIM ejector tool at the airport
- Switch carriers without visiting a store
- Keep your home number active while using a travel plan
- Plans can be purchased and installed before you leave Australia
The main limitation is carrier support. Not every carrier in every country offers eSIM plans yet, though coverage is growing rapidly. If you travel to a region where eSIM support is limited, you may still need a physical SIM as a backup.
How does eSIM work for international travel on iPhone?
International roaming with an eSIM works the same way as roaming with a physical SIM, but with far more control over which line handles your data. That control is where eSIM genuinely earns its place for travellers.
iOS 26 introduces a “Turn On Travel eSIM” notification that appears when you land abroad. It gives you two clear options: use your travel eSIM only, or use your travel eSIM alongside your home line. That choice matters more than most people realise.
Using both lines simultaneously means your primary Australian number stays reachable for calls and SMS. However, your home line may still incur roaming charges if it handles any data. Selecting “travel eSIM only” for data avoids that entirely.
Practical tips for using eSIM abroad:
- Purchase your travel eSIM plan before you leave Australia. Activation is instant and you arrive connected.
- Set your travel eSIM as the default data line as soon as you land.
- Turn off data roaming on your home line to prevent unexpected charges.
- Keep your home line active for calls and SMS so contacts can still reach your Australian number.
- Buy an eSIM before your trip to compare plans and pricing without airport pressure.
You must have an unlocked iPhone to use a local eSIM in another country. If your iPhone is locked to an Australian carrier, you will need to roam on that carrier’s international rates or contact them to unlock your device before departure. Some countries also require identification such as a passport to activate a prepaid local eSIM plan in person.
Pro Tip: Activate your travel eSIM at home over Wi-Fi before you board. Some carriers require a stable connection during activation, and airport Wi-Fi is unreliable. Arriving with a working eSIM saves you the stress of sorting connectivity on the ground.
For a full breakdown of eSIM use overseas, including cost comparisons and carrier recommendations for Australian travellers, Esim4u has a dedicated 2026 travel guide worth reading before your next trip.
How to transfer an eSIM to iPhone from android or another iPhone
Transferring an eSIM to a new iPhone is now more straightforward than it was even two years ago, thanks to iOS 26 improvements. The process differs depending on whether you are moving from another iPhone or switching from Android.
Transferring from a previous iPhone
- Open Settings on your new iPhone and tap Cellular.
- Select Add eSIM, then choose Transfer from Nearby iPhone.
- Place both iPhones close together and follow the on-screen prompts.
- Confirm the transfer on your old iPhone when asked.
- Wait for the profile to download and activate on your new device.
Transferring from android to iPhone
iOS 26 adds a dedicated transfer from Android workflow inside Settings. Go to Settings > Set Up Cellular > Transfer from Android. Both devices need Wi-Fi and Bluetooth enabled throughout the process.
The transfer generates a QR code on your Android device. Your iPhone scans it to pull the eSIM profile across. Success depends entirely on whether your carrier and your Android device support the transfer protocol.
Carrier and device support is the biggest variable in this process. If your carrier does not support digital transfer, the workflow will tell you. Your fallback options are:
- Contact your carrier directly and ask them to issue a new eSIM QR code for your iPhone.
- Use the manual activation code method if your carrier provides one.
- Visit a carrier store and request an eSIM reassignment to your new device.
After any transfer, send yourself a test SMS and make a call to confirm the line is active. Check that your data connection works on the transferred line before relying on it.
Key takeaways
eSIM on iPhone stores cellular plans digitally inside the device, giving you the ability to switch carriers, add travel plans, and manage multiple lines without ever touching a physical SIM card.
| Point | Details |
|---|---|
| eSIM is built into the device | No physical card is needed; plans are downloaded and managed entirely in Settings. |
| Multiple profiles supported | iPhones can store up to eight or more eSIM profiles, making carrier switching instant. |
| Security advantage over physical SIM | An eSIM cannot be removed if your iPhone is lost or stolen, protecting your number. |
| Travel use requires an unlocked iPhone | A locked device cannot accept foreign eSIM plans; confirm unlock status before travelling. |
| iOS 26 improves travel control | The “Turn On Travel eSIM” feature lets you separate home and travel data to avoid roaming fees. |
Why eSIM changed how i think about travelling with an iPhone
I used to carry two phones when travelling. One for my Australian number, one with a local SIM from wherever I landed. It sounds absurd now, but that was the practical solution before eSIM became reliable on iPhone.
The shift happened gradually. Early eSIM support on iPhone was patchy. Carrier support was inconsistent, activation sometimes failed, and the whole thing felt like a workaround rather than a proper solution. I was sceptical for longer than I should have been.
What changed my view was a trip through Southeast Asia where I pre-loaded three different regional eSIM plans before leaving Sydney. I switched between them in Settings as I crossed borders. No SIM swapping, no hunting for a local phone shop, no losing a tiny card in a hotel room. It just worked.
The part most people get wrong is line management. They activate a travel eSIM and assume their home line is dormant. It is not. If your home line is set as the default for data, you are roaming on it even with a travel eSIM installed. iOS 26 addresses this more clearly than previous versions, but you still need to check your Settings manually when you arrive.
My honest advice: buy your travel eSIM a few days before departure. Activate it at home. Confirm it shows as active in Settings. Then set it as your default data line the moment you land. That sequence removes almost every connectivity problem I have seen travellers encounter.
eSIM is not perfect yet. Carrier support gaps exist. Transfer from Android can still fail depending on your carrier. But for Australian iPhone users who travel regularly, it is the most practical connectivity tool available right now.
— Peter
Ready to stay connected abroad? Esim4u has you covered
Esim4u is an Australian travel eSIM store offering prepaid global eSIM plans for iPhone users heading overseas. Plans are available online, activate instantly, and work on any unlocked iPhone XS or later. You can browse affordable travel eSIM plans by destination, purchase in minutes, and have your eSIM ready before you leave home. No queues, no airport SIM shops, no surprise roaming bills. Esim4u also provides a clear iPhone eSIM installation guide so you know exactly what to do from the moment your plan arrives. If you hit a snag during activation, the support team is there to help you get connected fast.
FAQ
Which iPhone models support eSIM?
eSIM is supported on iPhone XS and later, including all iPhone 14, 15, and 16 models. iPhone 14 models sold in the United States are eSIM only, with no physical SIM tray.
Can i use two phone numbers on one iPhone with eSIM?
Yes. iPhone supports Dual SIM through a combination of eSIM profiles, letting you use two active lines simultaneously for calls, SMS, and data on the same device.
What happens to my eSIM if i lose my iPhone?
An eSIM cannot be physically removed from a lost or stolen iPhone, which prevents someone else from using your number on another device. Contact your carrier to suspend or transfer the plan.
Do i need wi-fi to activate an eSIM on iPhone?
Most iPhone eSIM activations require a Wi-Fi connection, though some eSIM-only iPhone models can activate over cellular in certain regions. Activating at home over Wi-Fi before travel is the most reliable approach.
Can i transfer my eSIM from android to iPhone?
iOS 26 supports eSIM transfer from Android via Settings > Set Up Cellular > Transfer from Android, using Wi-Fi and Bluetooth. If your carrier does not support the transfer, contact them directly for a new QR code or activation code.
Recommended
Related Blogs
Explore the World Without Roaming Worries


100% Money Back Guarantee
If you cancel your trip or experience tech issues that we can’t fix; we’ll refund you 100%.