


eSIM for Japan travel explained: 2026 guide
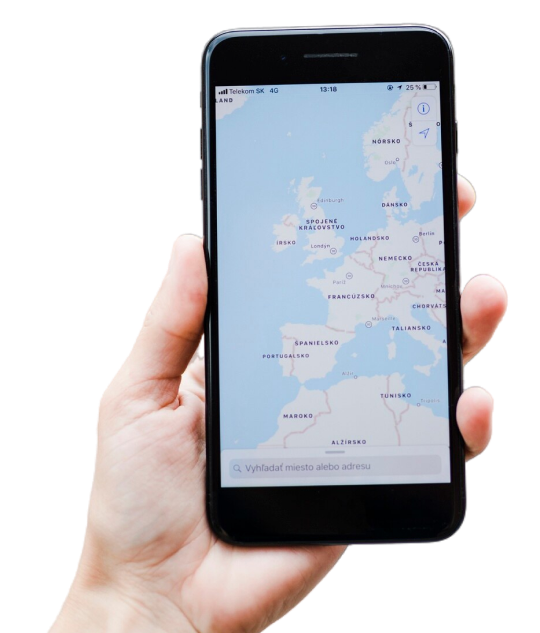
An eSIM for Japan travel is a built-in digital SIM profile that activates mobile data on your phone without needing a physical card. Unlike a traditional Japan travel SIM card, an eSIM is downloaded directly to your device, meaning you can buy it online, install it before you leave home, and be online the moment you land in Tokyo or Osaka. Modern smartphones including iPhone XS and later, Google Pixel 3 and later, and Samsung Galaxy S21 and later all support eSIM. Providers like Airalo, Saily, and Yesim offer Japan eSIM plans, and Esim4u makes it straightforward for Australian travellers to get set up. One critical update for 2026: Japan now requires ID verification for all eSIM activations, so preparation before departure matters more than ever.
How do you get and activate a Japan travel eSIM correctly?
Getting your eSIM right comes down to a clear sequence of steps. Many travellers assume that scanning the QR code means they are instantly online. Installation and activation are separate steps, and mixing them up causes most arrival-day headaches.
Follow these steps for a smooth setup:
- Purchase your eSIM online before you travel. Choose a plan that matches your trip length and data needs. Esim4u offers Japan eSIM plans with reliable NTT Docomo network coverage.
- Check your phone is unlocked. Your device must be unlocked to use another carrier’s eSIM. Contact your Australian carrier to confirm this before departure.
- Install the eSIM profile on your home Wi-Fi at least one or two days before flying. Scan the QR code from your purchase confirmation, follow the prompts, and let the profile download fully.
- Keep the eSIM profile inactive until you land. Do not set it as your active data line yet.
- Enable Aeroplane Mode during your flight to preserve your settings and avoid any unintended roaming charges.
- After landing, turn off Aeroplane Mode and go to your phone’s cellular settings. Select the Japan eSIM as your active data line.
- Turn on Data Roaming for the Japan eSIM line. This is the step most people miss. Forgetting to enable Data Roaming after landing causes 90% of connection issues. Without it, your phone will not connect to the local network even with a valid eSIM profile installed.
- Configure dual SIM roles. Set the Japan eSIM as your data line and keep your Australian SIM active for voice calls and SMS. This way you can still receive one-time passwords and calls on your home number.
Pro Tip: If you land and still have no signal after enabling Data Roaming, toggle Aeroplane Mode on and off, or restart your phone. This forces the device to re-register on the local network and solves most lingering connection problems.
On Android devices, you may also need to manually enter the APN settings provided by your eSIM provider. These are usually included in your purchase confirmation email. iPhone users generally do not need to adjust APN settings manually.

What are the 2026 ID rules affecting Japan eSIM activation?
Japan’s regulatory environment changed significantly in April 2026. The Ministry of Internal Affairs and Communications introduced mandatory identity verification for all data-only SIM and eSIM activations in the country. This applies to both physical SIM cards and eSIMs, and it affects tourists and residents alike.
Here is what the new rules mean for you if you are purchasing your eSIM at the airport.
- Tourists and short-term visitors must present a valid passport during eSIM activation.
- Foreign residents must show their residence card instead.
- Anonymous eSIM purchases are no longer permitted. Every activation requires verified identification.
- Online providers may ask you to upload a photo of your passport as part of the purchase process.
- In-person activations at airports or convenience stores will require you to present your passport physically.
The practical takeaway: Pre-purchasing your Japan eSIM before departure is now the smartest move. Buying online through a provider like Esim4u means you can complete ID verification from home, avoid queues at Narita or Haneda airports, and have your eSIM profile ready to activate the moment you land.
The 2026 rules also mean you should prepare clear passport photos in advance. Blurry or incomplete uploads will delay your activation. Keep a high-resolution scan of your passport on your phone or in cloud storage before you travel.
How do Japan’s major eSIM providers and carriers compare?
Choosing the best eSIM for Japan is not just about price. Coverage and network routing matter far more for a smooth trip, particularly if you are travelling beyond Tokyo and Osaka.
Japan’s main carrier networks
Japan’s four major carriers each have distinct strengths:
| Carrier | Coverage strength | 5G availability |
|---|---|---|
| NTT Docomo | Best rural and Shinkansen coverage | Yes, major cities and corridors |
| KDDI/au | Strong urban and suburban coverage | Yes, major cities |
| SoftBank | Good metro coverage, weaker rural | Yes, major cities |
| Rakuten Mobile | Urban-only, limited rural reach | Yes, urban areas |
NTT Docomo offers the widest rural coverage and the strongest signal along the Tokaido Shinkansen corridor. If your itinerary includes Kyoto, Hiroshima, or regional areas outside major cities, a Docomo-routed eSIM is the most reliable choice. Airalo’s Japan plans run on the Docomo network, which is why they are consistently recommended for multi-city trips.
5G coverage is available on NTT Docomo, KDDI, and SoftBank in Tokyo, Osaka, and along main Shinkansen routes. Indoor coverage in older buildings can be inconsistent, so expect LTE speeds in some hotels and traditional venues.
What to know about Japan eSIM plans
Most Japan travel eSIM options are data-only. Japan eSIM plans rarely include voice calls or SMS, so you will need your home SIM or a VoIP app like WhatsApp or Skype for calls. Hotspot and tethering support varies by provider and plan, so check this before purchasing if you plan to connect a laptop or tablet.
For a short city trip of three to five days, a 3GB to 5GB data plan is usually sufficient for maps, messaging, and social media. For two weeks or a mix of city and rural travel, opt for 10GB or an unlimited plan with fair-use throttling.
What practical tips keep you connected smoothly in Japan?
Getting your eSIM set up correctly before you board is the single biggest factor in a stress-free arrival. Here are the most useful things to do:
- Install your eSIM profile at home, not at the airport. Pre-installing on home Wi-Fi days before flying avoids airport Wi-Fi congestion and reduces activation failures. Airport networks are often slow and unreliable, especially during peak arrival times.
- Label your eSIM profile clearly in your phone settings. Name it something obvious like “Japan Data” so you can find it instantly in your cellular settings after landing.
- Do not set the Japan eSIM as your data line before you land. Keep it installed but inactive during the flight. Activating it too early can cause unexpected charges or configuration errors.
- Carry your passport with you on arrival day. The 2026 ID verification rules mean you may need to present identification even for pre-purchased eSIMs during the final activation step.
- Test your connection immediately after landing. Open Google Maps or a browser at the airport to confirm data is working before you leave the terminal. If it is not, check that Data Roaming is enabled for the correct SIM line.
- Use your home SIM for calls and OTPs. Keep your Australian number active for two-factor authentication texts and calls. Many banking apps and booking platforms send verification codes via SMS.
Pro Tip: If you are on Android and your eSIM is not connecting after following all the steps, check your APN settings. Go to Settings, then Mobile Network, then Access Point Names, and enter the APN details from your provider’s confirmation email. This fixes most Android-specific connection issues.
Comparing coverage and network routing between carriers is more important than just price for a smooth Japan trip. A slightly cheaper plan on a weaker network will cost you far more in frustration when you are trying to navigate Kyoto’s backstreets or find a restaurant in rural Hokkaido.
Key takeaways
A Japan travel eSIM requires correct installation, Data Roaming activation, and passport-ready ID verification to work reliably from the moment you land.
| Point | Details |
|---|---|
| Install before departure | Download your eSIM profile on home Wi-Fi days before flying to avoid airport delays. |
| Enable Data Roaming on arrival | Turning on Data Roaming for the Japan eSIM line after landing is the most critical activation step. |
| 2026 ID rules apply | Passport verification is now mandatory for all Japan eSIM activations, including online purchases. |
| Choose Docomo-routed plans | NTT Docomo offers the best rural and Shinkansen coverage for multi-city Japan trips. |
| Keep home SIM active | Use dual SIM to retain your Australian number for calls, SMS, and one-time passwords. |
Why I think most Japan eSIM guides miss the point
I have helped a lot of travellers get connected in Japan, and the same problem comes up again and again. People focus entirely on finding the cheapest plan and completely overlook the activation sequence. They land at Narita, turn on their phone, and wonder why they have no data. Nine times out of ten, they simply forgot to turn on Data Roaming for the Japan eSIM line. It sounds obvious once you know it, but it is genuinely the number-one issue.
The 2026 ID verification changes have also shifted how I recommend people prepare. In the past, you could grab an eSIM at a convenience store with no paperwork. That option is gone. Now, the travellers who arrive most relaxed are the ones who purchased their eSIM online a week before departure, uploaded their passport photo during checkout, and had the profile sitting ready on their phone before they even packed their bag.
My honest recommendation: do not treat your eSIM as an afterthought. Sort it out the same week you book your flights. Pick a Docomo-routed plan if you are going anywhere outside Tokyo. Install it at home. Label it clearly. And the moment you land, the first thing you do after turning off Aeroplane Mode is check that Data Roaming is on. That single habit will save you a lot of stress at the airport.
— Peter
Get connected in Japan with Esim4u
Esim4u makes it simple for Australian travellers to buy and activate a Japan eSIM before departure. You can browse Japan eSIM plans with reliable NTT Docomo network coverage, choose the right data allowance for your trip, and complete ID verification from home to stay ahead of the 2026 regulations. If you are on an iPhone, the iOS installation guide walks you through every step clearly. Android users have a dedicated setup guide too. No queues at the airport, no scrambling for a SIM card on arrival. Just purchase, install, and go.
FAQ
What is an eSIM for Japan travel?
An eSIM for Japan travel is a digital SIM profile downloaded to your phone that provides mobile data connectivity in Japan without a physical SIM card. It works on unlocked smartphones including recent iPhones, Google Pixel, and Samsung Galaxy models.
Do I need ID to activate a Japan eSIM in 2026?
Yes. Since April 2026, Japan requires passport verification for all eSIM activations, including online purchases. Tourists must provide a valid passport; foreign residents must show a residence card.
Why is my Japan eSIM not working after landing?
The most common cause is Data Roaming being turned off for the Japan eSIM line. Go to your phone’s cellular settings, select the Japan eSIM, and make sure Data Roaming is enabled. Toggling Aeroplane Mode on and off can also help force a network connection.
Are Japan eSIM plans data-only?
Most Japan travel eSIM plans are data-only and do not include voice calls or SMS. Keep your home SIM active in dual SIM mode to receive calls and one-time password messages on your Australian number.
Which network is best for travelling outside Tokyo?
NTT Docomo provides the widest rural coverage and the most reliable signal along the Shinkansen corridors. For trips that include Kyoto, Hiroshima, or regional areas, choose a Japan eSIM plan that routes through the Docomo network.
Related Blogs
Explore the World Without Roaming Worries


100% Money Back Guarantee
If you cancel your trip or experience tech issues that we can’t fix; we’ll refund you 100%.