


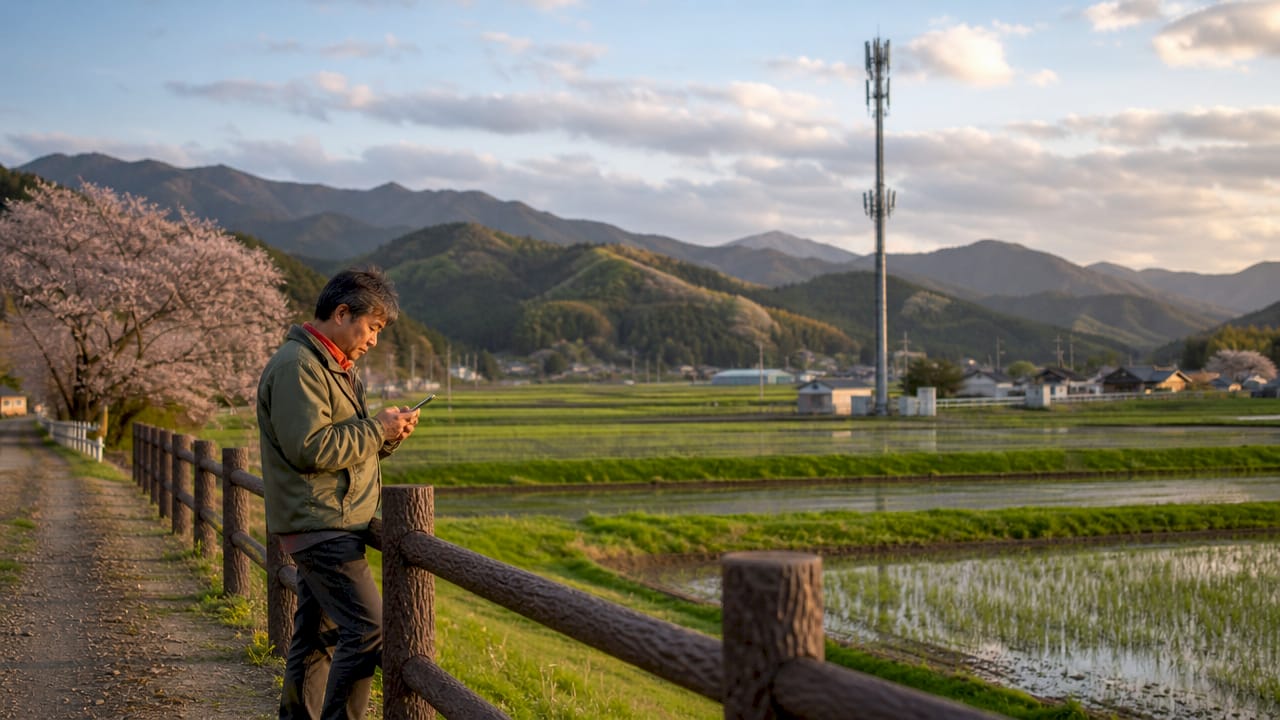
How to use eSIM in Japan from Australia: 2026 guide
An eSIM (embedded SIM) is a digital SIM card built into your phone that lets you connect to a local network without swapping a physical card. For Australians heading to Japan, this matters because Japanese carriers don’t offer prepaid tourist SIMs through standard retail channels, making eSIMs the most practical way to get connected. Providers like Airalo, Simify, and Holafly all offer Japan eSIM plans you can buy from Australia before you board. The major Japanese networks supporting these plans are NTT Docomo, SoftBank, and KDDI (au), each with different strengths depending on where you’re travelling.
How to use eSIM Japan from Australia: choosing the right provider and network
The right Japan eSIM depends on your itinerary, not just your budget. NTT Docomo, SoftBank, and KDDI are the three major networks, and each suits a different type of trip.
NTT Docomo covers the widest geographic area, including rural regions like the Japanese Alps and the full Shinkansen corridor. SoftBank and KDDI deliver consistent 5G performance in Tokyo, Osaka, and Kyoto. If your trip is city-focused, either of those two will serve you well. If you’re heading off the beaten track, Docomo is the safer pick.
Here’s how the three most popular Australia-accessible providers compare:
| Provider | Network | Best for | Data options |
|---|---|---|---|
| Airalo | NTT Docomo | Nationwide and rural coverage | Capped data plans |
| Simify | SoftBank | Short city trips, budget travellers | Capped, economical plans |
| Holafly | KDDI (au) | Heavy users, remote workers | Unlimited data options |
Airalo’s Japan eSIM runs on NTT Docomo and is a strong all-rounder for Australian travellers who want reliable coverage across both cities and regional areas. Simify connects through SoftBank, making it a solid budget choice for trips of seven days or fewer in urban centres. Holafly uses KDDI and is the go-to for travellers who stream, video call, or work remotely while in Japan.
The best eSIM choice is about network reliability rather than price alone. A cheap plan on a weak network will cost you more in frustration than the few dollars you saved.
Pro Tip: If your trip includes both Tokyo and a rural area like Hakone or the Noto Peninsula, choose a Docomo-backed plan. Urban-only networks can drop out quickly once you leave the city limits.
Is your phone ready to use a Japan eSIM?
Device compatibility is the first thing to check before you buy. Around 90% of modern unlocked smartphones support eSIM technology, including the iPhone XS and later, Google Pixel 4 and later, and Samsung Galaxy S20 and later.
Your phone must also be unlocked. A phone locked to Telstra, Optus, or Vodafone will not accept a foreign eSIM profile. Contact your carrier to unlock it before you travel. Check your phone’s settings under “Mobile Data” or “SIM & Network” to confirm eSIM support is listed.
Key things to verify before purchasing:
- Your phone model supports eSIM (check the manufacturer’s website if unsure)
- Your device is carrier-unlocked
- Your phone’s operating system is fully updated (outdated firmware can cause activation failures)
- You have a stable Wi-Fi connection available for the installation process
- Your existing Australian SIM remains active for calls and two-factor authentication (2FA) SMS codes
Buying your Japan eSIM plan from a trusted provider before departure is the right move. Airport eSIM kiosks exist in Japan, but they are pricier and the selection is limited. Purchasing online from Australia gives you time to install and test the eSIM on your home Wi-Fi before you fly.
Pro Tip: Install the eSIM profile at home, not at the airport. You’ll have a steady Wi-Fi connection, no time pressure, and you can confirm the profile loaded correctly before you land in Tokyo.
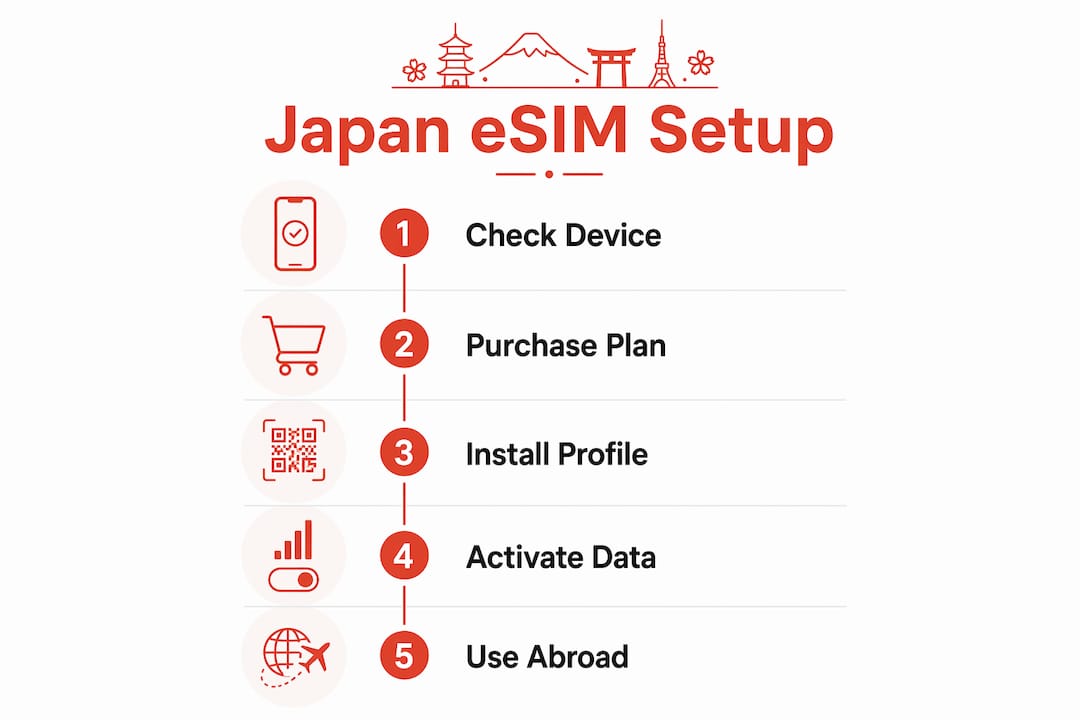
How to install and activate your Japan eSIM step by step
Installation is straightforward once your device is ready. Most providers deliver your eSIM as a QR code via email within minutes of purchase.
Installing via QR code
- Open your phone’s settings and go to “Mobile Data” (iPhone) or “SIM & Network” (Android).
- Select “Add eSIM” or “Add Mobile Plan.”
- Scan the QR code from your provider’s confirmation email.
- Follow the on-screen prompts to label the plan (e.g., “Japan Travel”).
- Set your Australian SIM as the default for calls and SMS, and set the Japan eSIM as the default for mobile data.
Activating on arrival in Japan
Once your plane lands, follow these steps:
- Turn off aeroplane mode.
- Go to your mobile data settings and switch your active data SIM to the Japan eSIM profile.
- Toggle data roaming on for the Japan eSIM.
- Wait 30–60 seconds for the network to connect.
- Open a browser or app to confirm you have a live data connection.
Installing and activating your eSIM takes under two minutes once you land. Keeping your Australian SIM active in the background means you can still receive calls and 2FA codes on your home number without paying roaming rates for data.
Troubleshooting tips if activation fails:
- Restart your phone and try toggling the eSIM profile off and back on
- Confirm data roaming is enabled specifically for the Japan eSIM profile, not just globally
- Check that your provider’s plan has started (some plans activate on first use, not on purchase date)
- Contact your provider’s support chat if the network still doesn’t appear after two restarts
For detailed setup instructions, Esim4u has step-by-step guides for both iPhone eSIM setup and Android eSIM setup to walk you through every screen.
Common problems when using eSIM in Japan and how to fix them
Japan’s mobile network is excellent in cities, but a few challenges catch travellers off guard.
- Coverage gaps underground. Some basement and underground areas in Japan, including certain subway stations and shopping centre basements, have weak or no 5G signal. NTT Docomo actively addresses rural gaps, but indoor signal can vary across all networks. Download offline maps via Google Maps or Maps.me before you go.
- Locked phone surprises. Some travellers discover their phone is still carrier-locked only after they arrive. Always confirm unlocked status at least a week before departure so you have time to resolve it with your carrier.
- Multiple eSIM profile confusion. Modern phones can store several eSIM profiles but only activate one at a time. Label each profile clearly (e.g., “Telstra AU” and “Japan Docomo”) to avoid switching to the wrong one.
- Currency conversion fees. Some eSIM providers charge in USD or EUR. Check the total cost in AUD before you confirm purchase to avoid unexpected conversion fees on your card.
- eSIM fails completely. If your eSIM stops working mid-trip, most major Japanese airports and electronics stores like Yodobashi Camera stock physical tourist SIMs as a backup. It’s a last resort, but it’s available.
Key takeaways
Using an eSIM from Australia for Japan travel is the most practical and cost-effective way to stay connected, provided you choose the right network for your itinerary and prepare your device before departure.
| Point | Details |
|---|---|
| Match network to itinerary | Choose Docomo for rural areas, KDDI or SoftBank for city-focused trips. |
| Check device compatibility | iPhone XS, Pixel 4, and Samsung S20 or later all support eSIM. |
| Buy and install before you fly | Purchase online from Australia and install on home Wi-Fi to avoid airport stress. |
| Keep your Australian SIM active | Your home SIM handles calls and 2FA codes while the Japan eSIM handles data. |
| Have a backup plan | If your eSIM fails, physical tourist SIMs are available at major Japanese airports. |
My honest take on Japan eSIMs for Australian travellers in 2026
I’ve used eSIMs for Japan trips several times now, and the single biggest mistake I see other Australians make is buying based on price alone. A plan that saves you $5 but runs on a network with patchy rural coverage will let you down the moment you step off the Shinkansen in a smaller city.
My preference is a Docomo-backed plan for any trip that goes beyond Tokyo and Osaka. The coverage difference in places like Hiroshima, Kanazawa, or the Kii Peninsula is noticeable. Docomo simply reaches further. For a pure city trip, KDDI through Holafly gives you fast 5G and the unlimited data option is genuinely useful if you’re navigating constantly or video calling home.
Buying before departure is non-negotiable in my view. I’ve watched people scramble at Narita Airport trying to sort connectivity while jet-lagged. Installing your eSIM at home on a stable Wi-Fi connection takes five minutes and removes that stress entirely. The providers have improved their QR code delivery speeds significantly. You can buy, install, and confirm your plan is ready within 20 minutes of purchase.
One thing that doesn’t get enough attention: keep your Australian SIM active in the background. Your bank, your email, and half your apps will send 2FA codes to your Australian number. If you deactivate your home SIM, you’ll be locked out of accounts at the worst possible time.
— Peter
Esim4u makes your Japan eSIM simple from Australia
Esim4u is an Australian travel eSIM store with plans specifically built for Japan travel. Whether you want capped data on the NTT Docomo network for broad coverage or a flexible multi-country plan, Esim4u has options that suit both short city breaks and longer regional trips. Setup is straightforward, with dedicated installation guides for Apple and Android devices so you’re never left guessing. Plans are priced transparently in AUD, so there are no currency conversion surprises at checkout. Visit Esim4u to browse Japan eSIM plans and get connected before you board.
FAQ
Does my Australian phone work with a Japan eSIM?
Most modern unlocked smartphones support eSIM, including iPhone XS and later, Google Pixel 4 and later, and Samsung Galaxy S20 and later. Your phone must be carrier-unlocked before an international eSIM profile will work.
Which Japanese network gives the best coverage?
NTT Docomo provides the widest coverage across Japan, including rural areas and the Shinkansen corridor. SoftBank and KDDI deliver strong 5G performance in major cities like Tokyo, Osaka, and Kyoto.
When should I activate my Japan eSIM?
Install the eSIM profile on home Wi-Fi before you fly, then activate it by enabling data roaming once you land in Japan. The network connection typically takes 30–60 seconds to establish.
Can I still receive calls on my Australian number while using a Japan eSIM?
Yes. Keep your Australian SIM active alongside your Japan eSIM. Set the Japan eSIM as your default data connection and your Australian SIM as the default for calls and SMS.
What happens if my eSIM stops working in Japan?
Restart your phone and toggle the eSIM profile off and back on first. If the issue persists, physical tourist SIMs are available at major Japanese airports and electronics retailers as a backup option.
Recommended
Related Blogs
Explore the World Without Roaming Worries


100% Money Back Guarantee
If you cancel your trip or experience tech issues that we can’t fix; we’ll refund you 100%.